This Website
Why not make my first post be a description of how I put together this website? It will help me when I come back and wonder what I did.
My overall goals are to:
- host it on github
- don’t hard code it in html/css/js
- have it look a little cool
- make a website that has my picture, info, and a blog
Github
The github part is quite easy, I just made a repo named ianbriggs.github.io
and placed an index.html file in it.
After making the repo all I had to do was:
> git clone git@github.com:IanBriggs/ianbriggs.github.io.git
> cd ianbriggs.github.io
> echo "Hello world" > index.html
> git add index.html
> git commit -m "Hello world"
...
> git push
...
This made the address https://ianbriggs.github.io/ look like this:
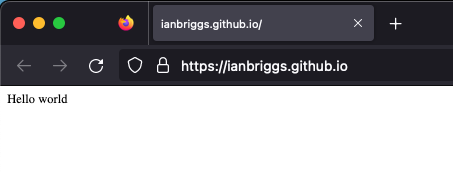
Yay! I have a website on github. Let’s move on to using jekyll.
Static site generator
I am loosely following the github guide for using jekyll. So I am making this on a Mac, which means when I try to install jekyll using gem it errors out due to permissions.
> gem install bundler jekyll
Fetching bundler-2.4.17.gem
ERROR:  While executing gem ... (Gem::FilePermissionError)
    You don’t have write permissions for the /Library/Ruby/Gems/2.6.0 directory.
> which gem
/usr/bin/gem
I could run it with sudo, but I have destroyed enough systems to have a
pathological fear of the power given by that particular command.
To get around this I use brew to get a non Apple ruby
install and then refresh my zsh environment:
> brew install ruby
...
ruby is keg-only, which means it was not symlinked into /opt/homebrew,
because macOS already provides this software and installing another version in
parallel can cause all kinds of trouble.

If you need to have ruby first in your PATH, run:
  echo 'export PATH="/opt/homebrew/opt/ruby/bin:$PATH"' >> ~/.zshrc
...
> echo 'export PATH="/opt/homebrew/opt/ruby/bin:$PATH"' >> ~/.zshrc
> source ~/.zshrc
> which gem
/opt/homebrew/opt/ruby/bin/gem
Now when I call gem it will give me the brewed one.
Onward to victory!
With that out off the way I can install jekyll and build an example website.
> gem install bundler jekyll
...
Done installing documentation for webrick, unicode-display_width, ...
29 gems installed
> jekyll new --skip-bundle .
...
> git add --all
> git rm index.html
> git commit -m "Jekyll"
...
> git push
...
Now github will magically build the website for me, which takes a little while.
Note: I stopped following the guide at this point and had to come back here.
The website still builds, but I would like it to use github’s gems.
To do this I commented out the gem "jekyll" line, uncommented the line with
gem "github-pages", then added "~> 228",.
My shiny new statically generated website looks like this:

That is good for when I want to deploy, I can push and have the system build and
update, but not so good for playing around.
For that I need my local machine setup to run it, first I add webrick since
I’m running Ruby newer than 3.0.
> bundle add webrick
> bundle install
...
> bundle exec jekyll serve
...
    Server address: http://127.0.0.1:4000/
  Server running... press ctrl-c to stop.
Themes
Github has a short list of approved themes.
For now I will chose one and cross my fingers that it works.
It seems like the best thing to do is download
minima and modify things.
I moved over _includes, _layouts, assets, and _config.yml.
To get rid of the RSS button I commented out the section of
_includes/footer.html.
I’ll have to come back to this later to customize the look, since CSS is not my
strength.
My info
Moving onto adding my information.
Changing the defaults looks to be as easy as editing _config.yml.
After editing I relaunch bundle exec jekyll serve to see the updates locally.
For some reason this is one of the few files that don’t automatically get
updated when running the server.
I don’t really want a seperate “About” page, so I will remove about.md and
just put that information in index.md.
Notes:
- I’ve renamed all
*.markdownfiles to*.md - I place images in
assets/then can display them in here via the markdown. The leading slash is important. - For more control the images can be placed using html.